{i'm really loving this happy dancing!}
i really loved Making Memories FaLaLa collection from last Christmas. i did not think they could beat it. i was wrong. their Mistletoe collection is truly incredible and fun to create with. little felt embellishments. felt snowflakes. and those amazing trees...on an entire sheet of 12x12 paper and trims!! i loved cutting out the trees from the paper and i used lots on my projects. (peaceful while i watch my favourite tv shows in the evening)
my other currrent favourite of theirs is their entire Vintage Findings.
{dear santa.....you know i've been good!! wink, wink! i'm sure much of it would fit into my stocking this year}
this project was something i had been thinking about doing for awhile, and i thought that the Mistletoe collection would be perfect. it totally inspired me to put together my collection of our holiday favourite traditions. it's kind of like a large matchbox album. it has a few pages for photos and notes. in the very centre is a "pocket" that holds 4 pages of recipes and even more photos.
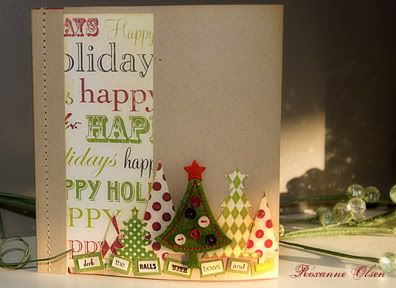
it will even stand up on it's own when the cover is closed.
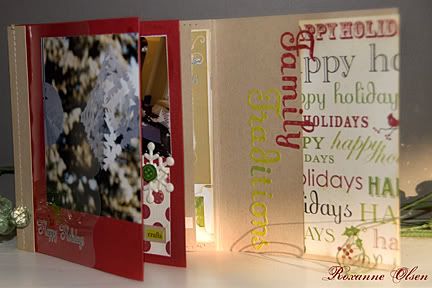
open album. you can see the red pages that hold the photos. i also adhered some clear transparency pages. {i think they have little journaling books for most of their collections. they are very handy!}
to make the cover:
(1) trim cardstock to 6x12.
(2) make score lines at approximately 3/4 inches, 1 1/2 inches and then two more at 7 and 7 1/4 inches.
(3) fold the first score line toward the long side of the paper, then make the next fold under that one (double fold). this will become the "spine" for your album.
(4) fold the second score lines (7 and 7 1/4) towards the "spine". they should be able to tuck under the the edge of the spine to keep the album closed.
don't put it away just yet, we need to make the interior pages and do some sewing!
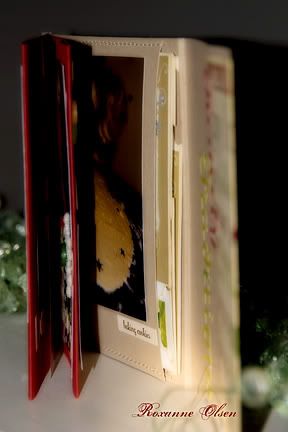
another view of the interior pages. just so you can get a feel for the mini-album.
to make the "pocket":
trim another piece of cardstock to 4x6 inches. adhere to the centre back section of the cover. i used my sewing machine to stitch along the top and bottom portions of the pocket.
to make the "album" pages:
(1) trim 2 sheets of paper (could be cardstock or a lighter paper). to 6x10 1/2. score and fold each at 5 1/4 inches.
(2) tuck the cut edges into the spine, even with the sides.
(3) use your sewing machine to straight stitch along the spine to bind the pages and spine together. your line of stitching should be slightly off centre towards the left. (with some patience, you could do this by hand with a paper piercer and a threaded needle. for me, sewing is easier and faster)
the base of the album is now complete!
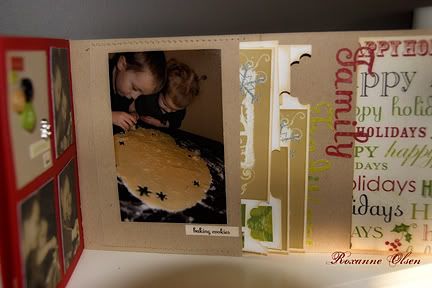
here you can see the "pocket" i created in the centre of the last page. i pulled out a few of the recipe cards to show where they are hidden.
to make the pocket inserts:
(1) trim 4 pieces of cardstock to 4 1/2 x 5 1/2 inches.
(2) to mark out the placement for the tabs, i found the centre of the page. then i divided each half again, making the page into a quarter. light pencil lines help with this! (measure on one page, then transfer to the other 3)
(3) i centred the punch between the "quarter markings" to cut holes in the edges of the cardstock. only slide the paper punch halfway into the paper, to form a type of tab.
(3) these sheets will stack together and then slide into the centre pocket.
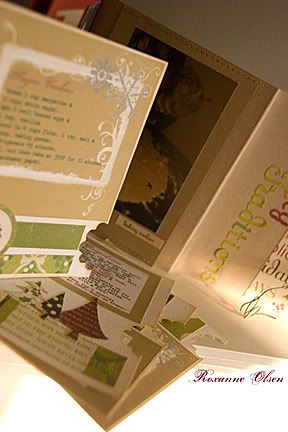
i pulled them out, so you can see more of the details. i did not add any thick embellisments because you don't have a lot of room for that. i also made them out of cardstock...they need to be durable enough to get pulled out when needed.
at this point you can start the fun stuff and decorate to your heart's content! this type of album is more suitable to "flat" layouts. the bulky stuff will work great on the cover, but not the inside. i love the word-fetti. it was used on almost every page! as well, the Making Memories glitter alphabet stickers (in red and green) are awesome here.
i know we'll treasure these easily forgotten traditions in the years to come. another reason why i scrapbook!!
i designed the recipes in Adobe PSE7, then printed them out on my printer at home. i selected a few sweet treats that we all enjoy making and eating at Christmas.
click on the images below, and you are welcome to use them in your own albums. {or kitchen!}


just to note! i am a cook and baker....but i have no skill in creating my own recipes. my best skill is to have awesome friends who share their favourites with me. {when i typed out the recipes i noticed that 2 friends contributed the most to our favourites....both with the name Joanne. interesting coincidence.} the sugar and gingerbread cookies will be the best you have ever eaten. and the icing is also incredible. Joanne C also gave me the most amazing whipped shortbread recipe. can't go wrong with butter and icing sugar!!
i'll share it here:
Whipped Shortbread (by Joanne C)
1 cup butter
2 cups white flour
3/4 cup icing sugar
combine all the ingredients and beat for 10 minutes. preheat your oven to 350F
i use a cookie press, so this is more firm and suitable for it.
{i make "trees" then add green sugar sprinkles. or i make "poinsettias" and add red sugar sprinkles. i am also in the market for a new cookie press....maybe there are more shape options?! i am hoping for a snowflake.}
if you don't have a cookie press, and just want to drop them on your cookie sheet. add 1/2 cup less flour and 1/4 cup less icing sugar.
cookie press cookies only need to be baked for 10-12 minutes, while the dropped cookies will need 17 minutes. when the bottoms are lightly browned, you know they are done!

No comments:
Post a Comment
Thank you for taking the time to comment!