
i had some spare time and thought i'd post this earlier.
photo editing can be an intimidating process. however if you can stick with it and try something new as you become more comfortable, then you will be editing all your photos. trust me on this!
the first part of the tutorial is for beginners to photo editing. if you are wanting to learn how i edited my photos in my Essence of Spring layout, then scroll towards the middle of the post. the first picture will indicate the start of that specific tutorial.
i would recommend to anyone to first check out PICNIK. it is free and simple to use. there are options where they ask you to pay for more complex edits....but i've not gone that route. i'll leave that choice up to you. follow the screens as you are prompted to 'get started' and 'upload your photo'. once it is on screen - very quickly! you have some option tabs at the top. for now go to 'create'. on your left you will see some options. this left 'box' is where you make your choices. when it first opens, you have the 'featured' picks. click on 'effects'. notice your photo is still where it always has been....centre screen. but the options in that left box have changed. none of these will change the effect on your photo.
let's start with black and white. this is a useful technique. click on the title. notice that selection opens up? if not, try a double-click. now slide the 'fade' bar to the middle. your photo is no longer black and white. you have 'desaturated' the colours. where you leave the 'fade' bar will determine how much colour you keep. this is one method to get a vintage look to a bright photo. if you like it, click on apply. if you don't click cancel. great, isn't it?! and...if you change your mind, there is an undo/redo button on the top right corner.
try a few more options. i like most of them. there are some fun options! this is something where you can spend an entire afternoon.
you can also add text, stickers, frames, etc.
when you are done go back to the edit screen. here is where you can choose your 'crop' size. in the 'crop' screen you can choose from popular printing options (like 4x6 or 5x7) or size it down for facebook. depending on your photo, you may want to rotate it first or remove some red eyes. there is also an auto-fix option. some photos will work well with this but others get all wonky! it isn't a perfect feature in any program.
then you can finish with "save and share". you can name your photo here. you can also compress it or keep it at a high quality. if i were to use it online, like my blog or facebook i would definitely compress it. possibly to a 7 (according to picnik). the computer screen can only depict a certain number of pixels, so putting it to high quality for internet use will eat up your disk space and not gain you any better clarity. if i were going to print it, i would save it at the highest quality.
i can't say how picnik does for printing, or if the price is right. i've always saved the photos to a file on my computer, sent it to Costco and picked it up there!
it does have its limitations but PICNIK is a great place to start. you will get accustomed to trying different filters/effects on your photos....decide what you like and don't like.... with cropping it is great if you got something in your photo that you don't want. like a corner of a building or an object sticking up. keep in mind that you won't want to crop out too much. experiment with it to see how much you can get away with. if you take out too much, your photo quality decreases. practice will show you!
at some point you are going to get to the point where you have done what you can with picnik and want to get more out of your photo editing. there are lots of choices. and it will depend on what your preferences are. my husband loves Adobe. when we bought our first point and shoot digital camera in 2004, he also picked up Photoshop Elements for $99 at Costco. i watched in wonder as he edited a photo to remove a walker from the background of a photo we took. i hated using it, so i didn't. that is the truth. i had another photographer friend who used another user friendly program at the time. she did all sorts of airbrushing to the edges of her photos and filters and made them every size under the sun. it was a very user friendly program. i was jealous.
then i started scrapbooking my photos. i had these cute shots of little Aidan as a baby. took them to get printed and parts of fingers, toes or heads would be cropped strangely. and i also wanted cool edges like Kirsten. oh the drama! there was no point buying a new program when we already had PSE. the choice was made. i started cropping so that i could control what got deleted from my photos. you can set your width and length to popular sizes or customize. the adobe manual was useless for my usage. the jargon wasn't in my vocabulary and confused me! i found tutorials online once in awhile that i liked. tastes change and i no longer use those original tutorials. once i got the hang of basic cropping and saving, the rest made more sense.
Scott Kelby has some great resources for using Photoshop Elements. i found some copies through the Edmonton Public library. the most recent Photoshop Elements release is #9 or PSE9. if you still have PSE3 on your computer, don't feel that you have to rush out to buy the most recent copy. it has changed, but it is still great for basic editing.
if you are an Apple fan then you may have used iPhoto or other Apple programs to edit your photos. i am an Apple fan but don't utilize the Apple programs right now. i nearly did....i've heard good things about Aperture and it's cost has been significantly lowered to $80 for the past few months. at the time when i was making my decision, the price was higher. i ended up with CS5. long story for that too. i do like it. i think it has more power than what i actually need. i do love the options i have with "actions". an action is basically a time-saving step to editing your photos. PSE can do nearly everything CS does, you just have to do it the long way. in the end your decision comes down to your personal choice and your bank account. the good thing is that Adobe lets you 'try-before-you-buy'. head over to their downloads section on their website and get a trial version of PSE9 or CS5 for 30 days.
i am proud to say that my persistence in learning PSE has paid off. Kristian now asks me how to use it when he needs it for work! yay!! this winter my neighbours wanted their photo taken, and they decided to go with a bad 80's theme. heehee i used CS to delete the picture in the background (wishing all that time that i had done that before i took the photo!) then i pasted in a new laser light background. it was a surprise for them and they loved it enough to make it their Christmas card. there is a neighbourly joke about garden gnomes. for fun i even planted a garden gnome between their heads. those gnomes are crazy, never know when they will pop up. or disappear! oh the fun of Photoshop!! forget losing an afternoon.....it is now days that i lose hanging out in photoshop-land!
now for the promised tutorial....
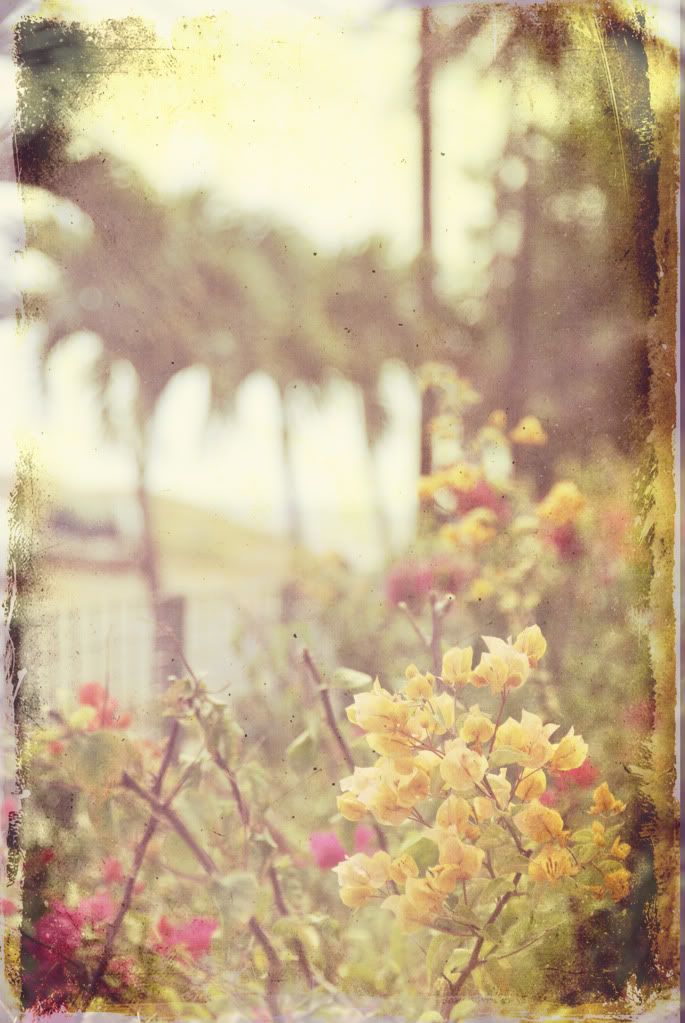
this is the final result. i've tried to make these instructions as simple as possible....but this is more of an intermediate level photo edit. it should be possible to follow if you are a beginner although some steps may be challenging. there are LOTS of photo editing tutorials here on the CoffeeShop Blog. there are a variety of them, and various levels of experience. Jessica Sprague is another useful resource on learning beginner PSE.
unless you are making money taking and editing photos, utilize the thousands of freebies online. there are lots of people who don't make a business out of this, but love to share. doing a google search will find you great sites. be careful too. you don't need to be downloading a virus as well as a freebie! they could be actions, presets, textures, brushes, etc...
one of my long-time favourites is CoffeeTeaPhotography. they changed their name recently to The Coffeeshop Blog. she has lots of freebies, tutorials and tips.
this is for PSE (Photoshop Elements). it can still be useful for CS. read on.
we are working with technology. stuff happens. use the "save-as-you-go" rule! especially when you are liking where your photo is at. take my word (and experience!) for it. i also save it as a copy with a different name. i never destroy my original because i may want to print it normal or with a different effect one day.
first i installed the action "Simply Vintage" into PSE. this is tricky. the process is different for PC than it is for Mac. in CS it is much more simple....there is a tab that says, "load actions". follow her tutorial for installing actions. it is a great tutorial and i can't improve on it. basically PSE is a program with many different files. you have to load a specific file from an "action" or "preset" into a specific file folder. once you connect those two, you load (or reload if it was already on) PSE and you are good to go.
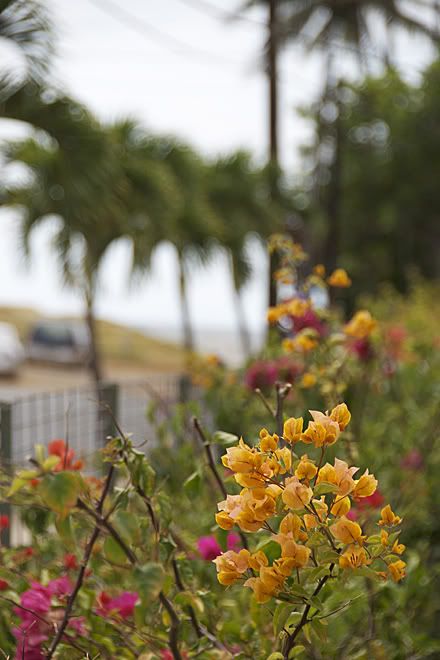
here is my original photo. straight out of camera.
when you work with actions you are adding extra layers to your photo. remember those cool books with transparency pages from your school days? think of the one with the human body. one page had the bones, then you layered the blood system over top...but you could still see the bones! then came the muscles... using PSE or CS is very similar. some tasks involve changing a single layer, but others will add a layer. the box in the bottom right of your screen will display all of your layers. each layer has an "eye" icon too. if you click on the eye (with 2 or more layers) then that layer disappears. some layers will be transparent and some will be opaque (not-transparent). the fun part is changing opaque layers to become sort of transparent!!
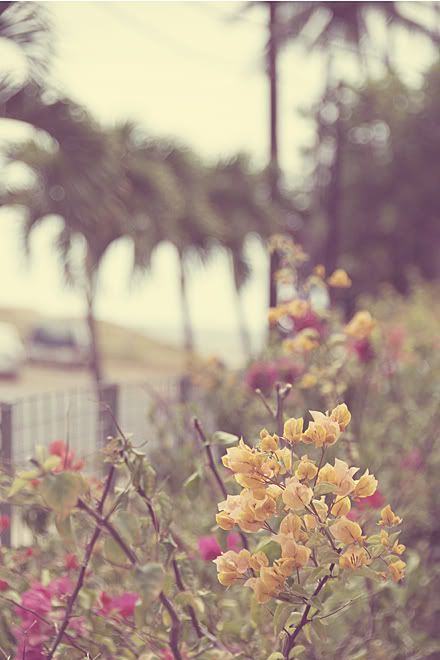
you will know your action is installed when you see it in the 'effects' box. just click and follow the instructions. this is one of the simpler actions.
there is an awesome tutorial on the CoffeeShop Blog for this action. i did not use it for the above photo. it may look like Greek writing to you, but it may be helpful for your photo to look its best.
notice in your 'layers' box that you have several layers? they may not make sense now, but at some point they will. cool, huh?! you can do something to some of those individual layers and change the photo even more. there are 2 smaller pull-down menus in the layers box. the first one (known as the Blending Mode) says "normal" by default, but you can change it to something else. the second one is "opacity". the default is 100%. you can pick a number between 0 and 100. we don't need to change any of these options right now. one day these too will make more sense and you will understand when you want to use them.
for now, pull down the 'layers' menu and select 'flatten image'. all the "visible" layers have merged into just one.
at this point you may opt to crop your photo (size it to 4x6 or 5x7 , etc) if you have not done so already. some photos can be cropped without losing any edges of the photo. at this point you definitely want to have your photo sized to the one that you want. with the texture we're adding you don't want to lose your edges....only because they are one of the best parts of this technique!
a quick note about cropping and sizing. don't ignore the box beside the width/length that says "resolution". this is important! most editors have their resolution set at 300 pixels per inch for having them printed. i follow that as well. when you use it online, the resolution does not need to be that high. i share that because nothing is worse than working hard on a great photo, only to have it turn out grainy because you cropped it at 92 pixels per inch resolution.
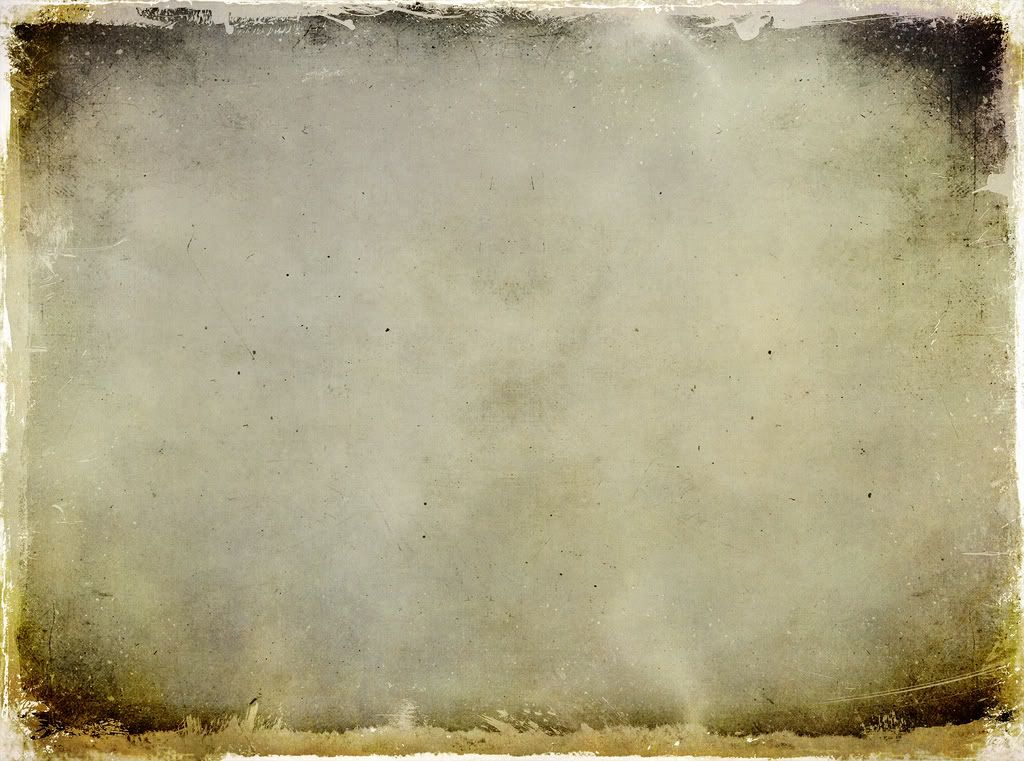
this is known as a texture. for my photo it will need to be rotated.
there are LOTS of free and cool textures available online. CoffeeShop has a few. there are several Flicker groups too. once you find one, it is pretty easy to find more.
the links are also in the tutorial at CoffeeShop, but here is another link to the texture image. save it to your computer as a jpg. you can also choose to continue to follow the last of the tutorial on the Coffeeshop Blog. the result will be the same.
open the texture into PSE and rotate it if necessary.
select your move tool (type 'v' - it looks like a + sign with arrows at each end) and slide it over your photo. you should notice two layers in the layer box - one is your photo and the other is the texture image. if not, try this step again. sometimes i click off of it too early, or have chosen the wrong tool.
the texture should be over top of the photo. move it over so that your photo is covered by it. you may need to alter the size of the texture to make it fit properly. click and drag the corners and edges if necessary.
now comes the magic! seriously. i don't think any other edit in PSE or CS is as magical and transforming as this!!
go to your "Layers" box (lower right) and select "Linear Light" in the first menu. cool! oh, wait! it gets better....
go to the second menu in the "Layers" box. change the opacity to a number near 40%. what did i say?! cool!!
when you are done select "flatten image" from the 'layers' menu at the top of your screen.
i love this combination!
on my spring layout i used the texture on all of my photos. i used the Simply Vintage action on some of them. on some of the photos it washed away too much colour and made the photo look badly. as you download some actions that you like you will find that not all photos will require the same action. some enhance, while others....well...dehance. ha! what else can i call it?!!
okay, go have fun!
If you want to edit your photos with ultimate ease and fun, Try ReaConverter Photo Editor. Apart from essential editing tools, this online service lets you apply different artistic effects, enhance portraits, and much more!
ReplyDelete