
let's start with this project that is long overdue for sharing....
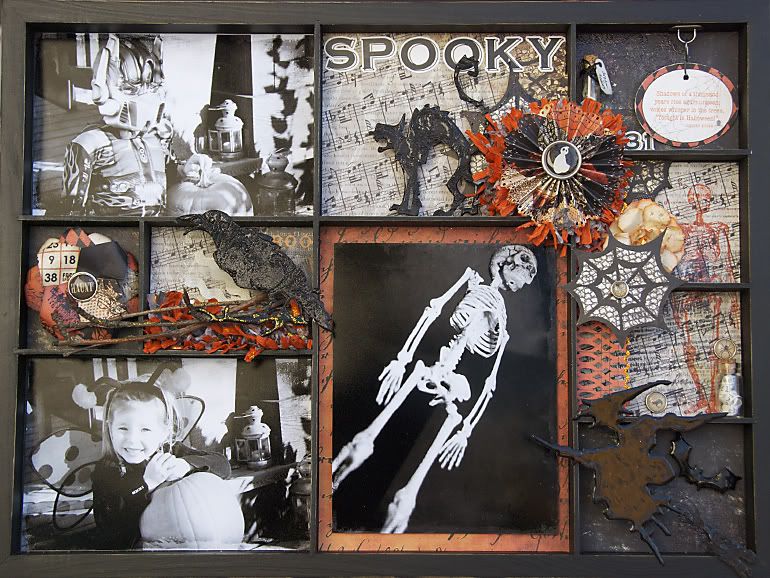
it was a lot of fun this month to be challenged to create a home decor item using our monthly design kits. i had mentioned before how diverse and amazing they all turned out.
i decided to make a shadow box. the photos are from last years' halloween. i added a texture, then changed them to black and white. the skeleton photo is from a party. it was fun to try and take some photos in the dim light and bring some life to the skeleton hanging from the ceiling.
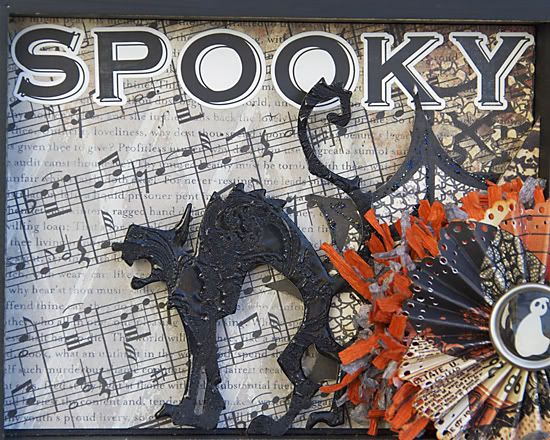
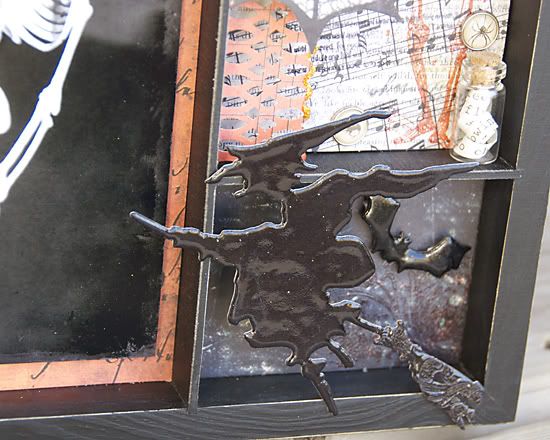
we had some chipboard die cuts included. i inked mine black, then embossed them. i repeated the embossing several times, and then stamped into the goo. i love the effect here.
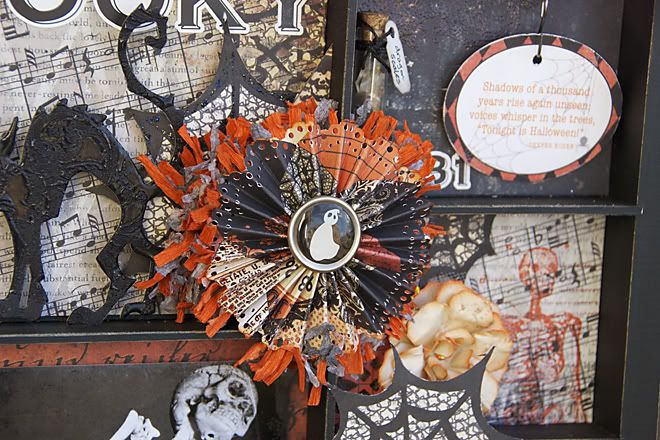
i had to make a rosette. in hindsight, i wish i had made more of these! not sure why that did not enter my thinking at the time. i made another paper rose, and inked the petal edges in spiced marmalade.
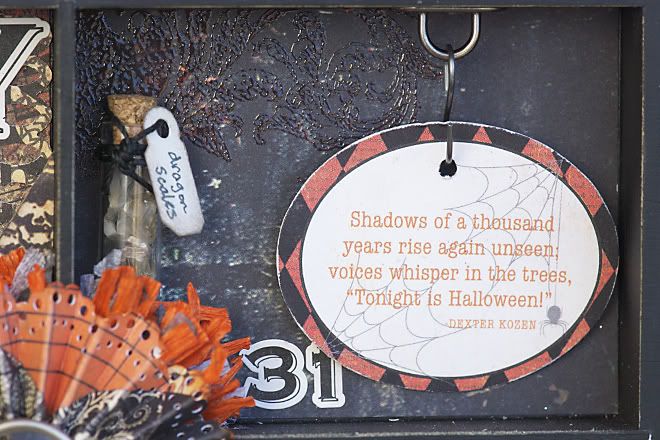
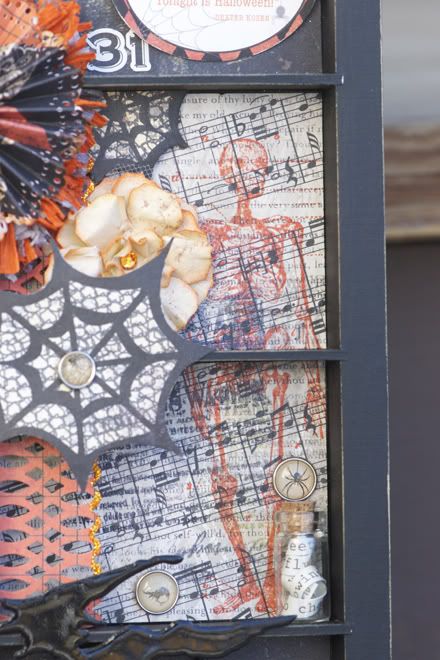
this quote is from the elements sheet that coordinates with the line...but not included in the kit. the quote reminded me of something i had heard a few times when i was younger. the "dragon scales" are actually pewter mica flakes. i love those little apothecary bottles. last year Kiara decided to be a dragon after she found out that Daddy was going to be a Viking. immediately she decided that she would be Daddy's pet dragon. ha! what a cutie!! the dragon scales are a reminder of that last minute costume change.
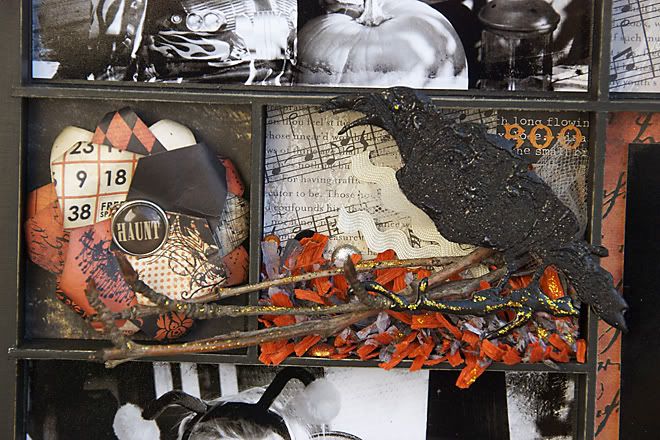
i did the same thing with the crow...just added some black glitter to the embossing powder. and that decision made it tough to capture a nice clear photo. i added extra brads and rhinestones to the background, because crows are birds who collect shiny objects. right?
the flower was simple. i cut up the diamond shapes from the one patterned paper. punched a hole in one corner, and slid a brad through it. then i rotated the petals and curled the edges under.
i first cut this paper into a single piece. stamped it, then cut it into 2 parts.
the vial is filled with another quote strip from the paper label.
this is what the chipboard looks like if you just emboss it repeatedly. i also added a bit of glitter too. you can get the same effect with using UTEE and a melting pot.
i think one of my favourite techniques lately has been to use my clear embossing powder with a variety of stamp colours. even a non-colour version with VersaMark has produced some neat effects.
but check out the store. the display is incredible. there are soooo many ideas for you to use to put together your own spooky display at home.
for now i have one more birthday to plan for. my oldest boy turns 7 years old tomorrow. i can not believe it. of course, if you ask him, he would tell you that it did not come fast enough!
this is one of my fave halloween shadowboxes ever.
ReplyDeletethe b/w photos are perfect. and your embossed stamping is spot on. personally, i think any more rosettes would be a distraction.
its great as is.
Great job! This is AWESOME!
ReplyDelete