
it was the first time in a long time where i taught a class to ladies who were not scrapbookers.
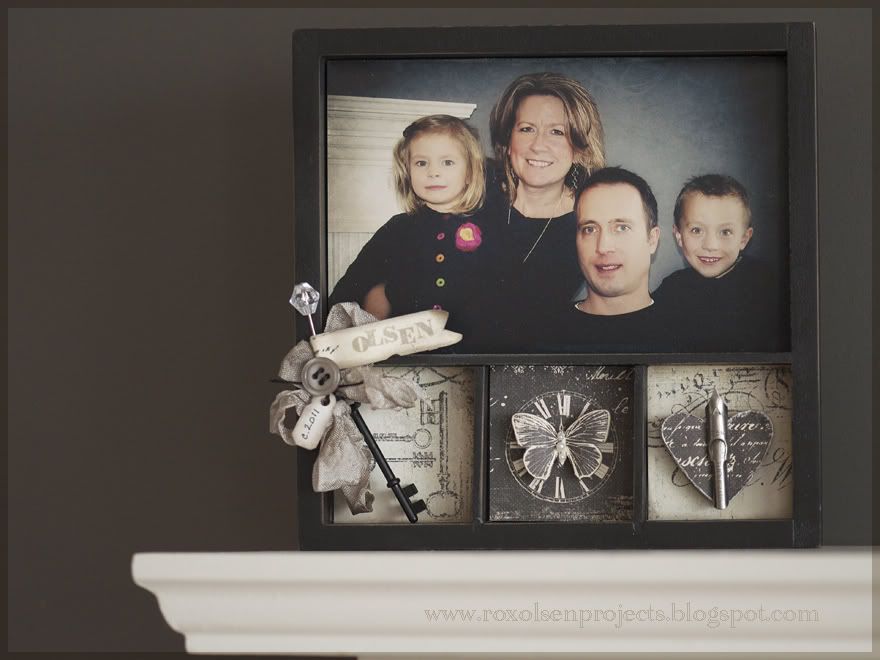
one of them shared a cute story with me: she told her young daughter that this frame was what they were going to give to her Grandma. in response, the young girl was not too thrilled and said to her mom, "will she like it? we don't even know those people, do we?!"
much to their relief, they all finished the project and were happy with the results. i was relieved that they enjoyed themselves and didn't spend money to get stressed!
i wanted to create something where they could copy the techniques to create a simple card.
a bit of edge distressing to hide any imperfect trimming job works awesome!
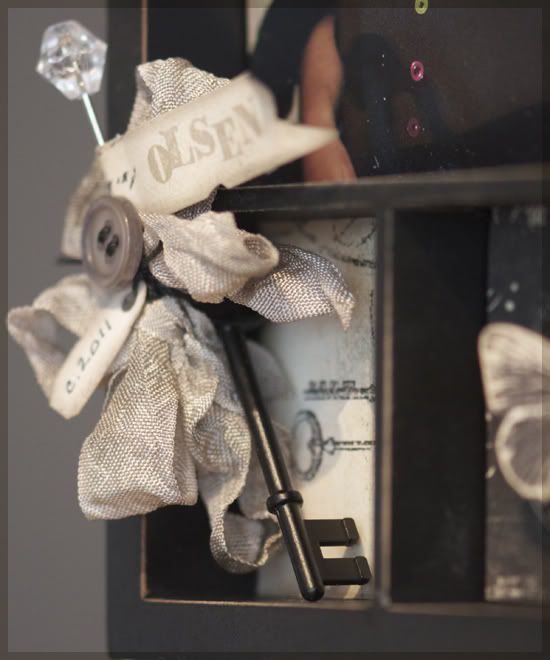
they got a quick ink lesson as well. then they got to get their hands dirty and colour their own ribbon. i pulled out other colours and they were able to customize this frame even more.
the ladies were very skeptical...but i also taught them how to tie a double bow and also "cheat" to add more loops. it is amazing what a well-placed glue dot can do!


you will need some ribbon that will hold the ink...old fashioned seam binding works perfectly.
scrunch the entire ribbon in your fingers and rub it into the ink pad. you will need to re-scrunch several times to get ink into the ribbon. the more ink on the ribbon, the darker the finished ink will become. then mist it with water and scrunch it into a tight ball. i like to ink my ribbons at the start of my projects and let them dry naturally as i work. the ribbon keeps the wrinkles and it is always a mystery how the ink will bleed and dry!
if you want a super intense and solid colour, rub the ribbon into the ink pad so that it is entirely inked. you can still add some water to ensure there are no un-inked areas.

another option is to use Distress Stain. think of it like liquid ink. rub it across the ribbon then scrunch to create wrinkles as it dries.

you can also use any kind of spray mist. Tattered Angels creates a multitude of colours, plus you will get some sparkle. Ranger has some Colour Wash colours that match a few of their popular inks. several of the paper companies are also selling their versions. you can get just the plain colour, or colour with some sparkle.
in fact you can make your own home-made dies. tea. coffee. kool-aid. there are so many herbal teas on the market now that you could use those to create some with pink or orange hues. we were joking in one of my classes that red wine also works well. yup! think of any clothing with a horrible stain that could actually look pretty if you did it on purpose. mustard is one colour that seems to maintain it's yellow hue rather well after repeated washings! home-made works too. i like to use my inks, stains and mists since i know their colour is guaranteed. but it is fun to play and experiment too.
well...lots to prepare for. more scrapbooking projects. cards. gift wrapping. cookie baking. all the fun stuff that needs time and lots of Christmas spirit!
No comments:
Post a Comment
Thank you for taking the time to comment!