
do you remember THIS teacher gift i made back in the spring? the covered Jenni Bowlin cigar box and mini album that fit inside?
i have this little problem with making things, falling in love with them and then giving them away. it definitely helps when the recipient also loves it. {insert sigh of relief!} it was a teacher gift for a special teacher.
the Urban Scrapbook Design Team was given an option to create a layout or a project with the October kit. i decided to do a halloween version of the cigar box mini album. this time i would get to keep it!
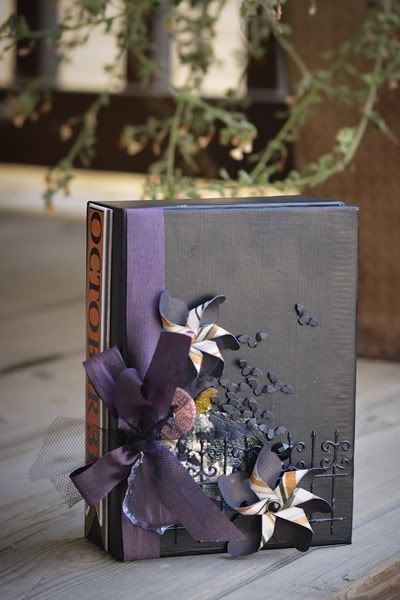
i painted the entire outside with Claudine Helmouth Black Gesso. it stuck and actually kept the sheen from the original box.
a technique i played with last year and still love is to emboss black shapes onto a black background. i did this with the lovely fence die cut.
for the pumpkins i also painted them with the black gesso. when they were dry, i added rock candy crackle paint. while it was still wet i added perfect pearl pigments. they get absorbed into the paint as they dry.
the pinwheels are a bit of my addiction right now. i can't get enough of them!
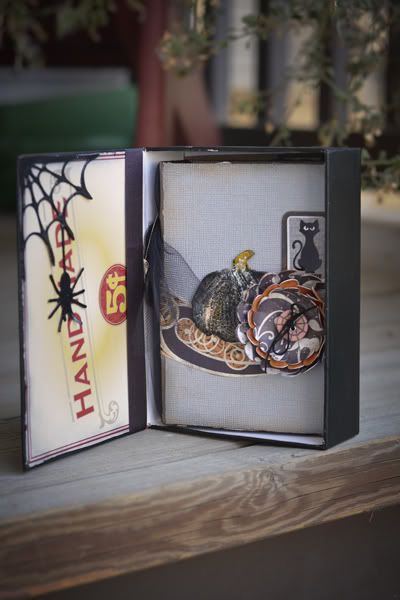
here is the inside with the mini album still tucked in. i didn't paint the inside and liked the contrast with the original cigar box for this part. the little spider die cut was from the Silhouette store and was cut to fit perfectly. you can get a better glimpse of the pumpkin in this photo. it is difficult to take a photo to do those pumpkins justice....you will have to take a trip to the store and check them out in person. the flower is a simple die cut shape also from the Silhouette store.
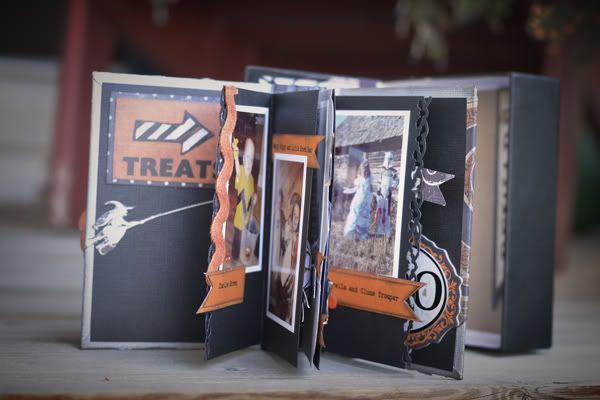
the mini is kind of my own design, based on my perspective from other minis and how the designer created theirs. there are so many unique designs out there. you could call this an accordion fold based design. the "spine" is accordion folded, with the pages adhered to the folds. perhaps a tutorial is needed?...i'll put it on the list! in the meantime, i am sure there are plenty other valuable instructions elsewhere on the internet.
i really liked how the covers turned out. i fussy cut the entire swirl and the little witch on her broom. it was too long for the cover, so the witch is bent around to the first inside page. scroll to the photo above and you can see how it fit together.
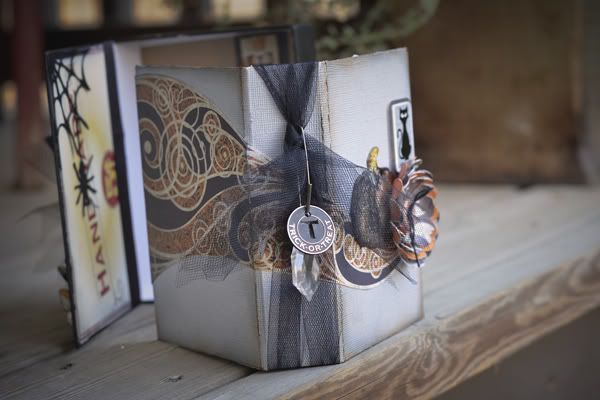
i inked the grey paper with black, brown and orange inks. the paper is a bit shiny, so it looked very unique. i love little surprises like that....when the end result is better than you had pictured. once in awhile i have those moments.
the pictures i used were all of my kids' halloween costumes up until this year. some years, they actually wore different costumes out to parties than the ones for trick-or-treating. i picked the ones that i remembered being the "special" costume. when they were small i went to Superstore and bought leftover costumes discounted 50% to 70% off. they loved them. it is sad that they are nearing the end of the "dressing up" phase.
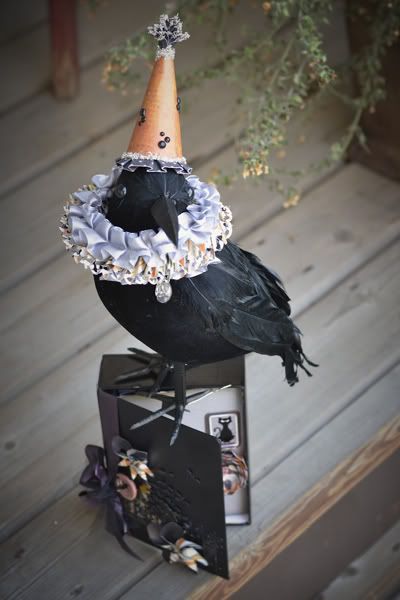
i couldn't resist a pose of my crow with the DT project. he kind of looks like he's guarding it! i know we will all enjoy looking through the album when it comes out for halloween. the kids especially enjoyed checking out the photos while i worked on the project. it was interesting to hear what they did or did not remember.
i stopped by Urban Scrapbook today. they always do an amazing job decorating and this year it is no different. there is lots of inspiration on display.
WOW~ incredible project Roxanne! you're a genius :)
ReplyDelete