
oh Canada. where it snows in autumn.
it was a huge headache if you wanted to get anywhere yesterday....but it was a beautiful view out of our windows.
last year it took a long time for the snow to finally fall. instead there were some mornings we had just a skiff of snow that made it look like God had sprinkled diamond dust over everything. i took inspiration from that memory and tried to add extra sparkle to my Urban design team layout.
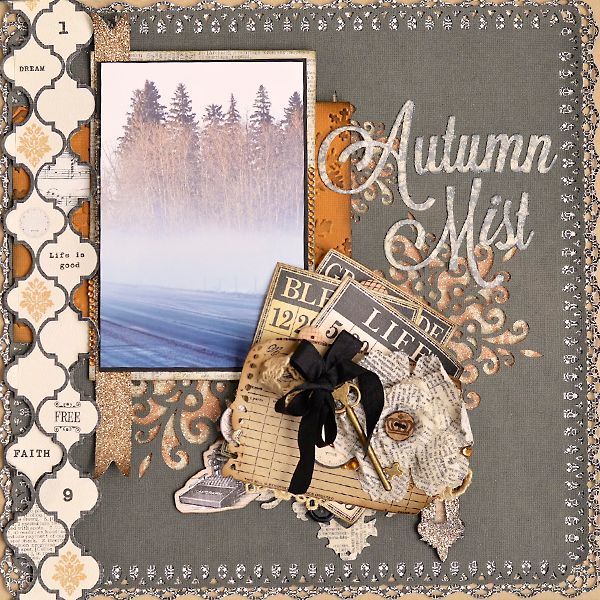
i cut snowflakes out of the grey cardstock with my Cameo. i love how easily i can re-size the flakes and move them exactly where i want them on my paper. then i added microbeads and glitter to the background paper. glitter and shiny things are really tough to photograph, and never look as good in photos as in person.
i also used some edge and corner punches on 2 of the paper sheets. but the middle edge punched paper is a bit of a cheat! i cut out the middle because i wanted to use that paper in other parts of my layout. in another move so typical of me, i messed up on the edge punching in one of the corners. well, possibly more than one. so i moved the strip of paper over to hide my mistake.
i love the paper with the moroccan style background. i loved it enough to use my craft knife and scissors to cut it out. and then cut out some of the inside pieces too.
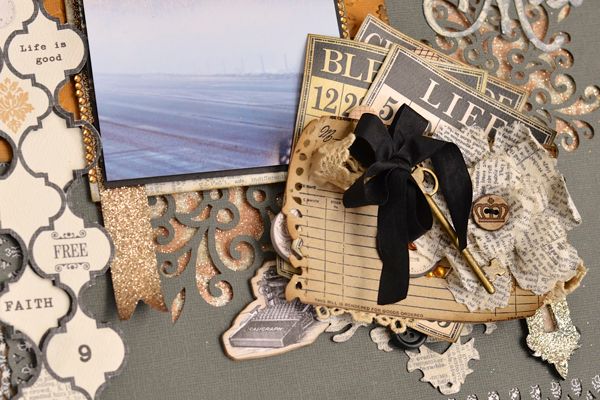
these keys from Prima are amazing. Graphic45 has a set of keys available this season too. both are lovely and unique from each other. for my lock, i first painted it with black gesso. then i adhered some lovely platinum dry glitter from Ranger. then i rubbed it to remove just enough for the black to show through. of course i had to ink it after that with some black ink! just shiny enough to make it tough to get a good photo.
the torn notebook page was custom designed to work with a stamp that i have. i used a Silhouette file, but resized it to work with the stamp. i need to try this technique more!
the muslin flowers were just stamped, inked and then stacked on top of each other. the odd foam pop dot added dimension where i wanted it.
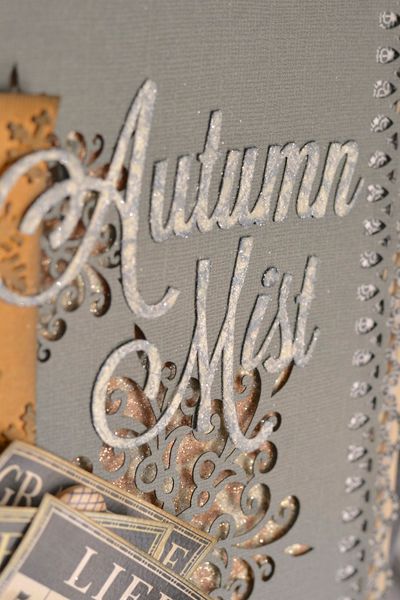
this new product is one of my favourites!!! the new "sticky embossing powder" from Ranger. 2 words. OH. MY. they also have a dabber filled with embossing fluid. i may never by an embossing stamp pad again. the dabber is like a brand new embossing pad every time you use it....all stamp pads lose their "juice" and need re-inking at some point. embossing pads seem to do this more quickly. i inked up my entire title then heat embossed with the sticky embossing powder. if you do it correctly normal embossing powders should not be sticky after they have cooled. except this product!! you want it sticky. the last step was to sprinkle clear rock candy dry glitter over it. just one more embellishment that was next to impossible to photograph!
any dry glitter will also work with liquid or dry adhesive too. BUT the nice part about the sticky embossing powder is that it does not need the drying time a liquid adhesive needs. and it is easy to apply and won't need any trimming like dry adhesive.
i really should have taken a photo of my craft room when i was putting together this layout. it was a royal disaster! i do have some awesome glitter trays....but fine glitter does not work well with them. and some embossing powders stick. so i had recycled papers all over...one for the embossing powder...one for each of the different glitters i was using....several for the embossing ink dabber. i'm pretty sure it looked a bit like Santa's workshop.....glitter floating in the air! it was a long week for the kids too because i didn't want them coming in, walking through the powder and sharing it with the rest of the house! even the hamster was banned from rolling around the room.
i brought out the same glitters and powders for the December year in review pages. less of a mess this time around! sometimes a new product comes in that requires some time spent playing and trying out new things. Tim Holtz used alcohol inks to add colour to the clear rock candy glitter for his October tag. check out his blog to see how he did it. it is totally as easy as he says! he also has examples of how each of the stickles glitter look beside each other. the rock candy dry glitter reminds me of snow and ice....so perfect as we head into winter.
while the snow is keeping me at home i have more projects on the go. feels so good to check things off my list! and the pretty snow is very inspiring for Christmas and winter themed projects.
No comments:
Post a Comment
Thank you for taking the time to comment!