
it is not a brand new product. but it has become more popular in the past few months. i love Jennifer McGuire's use of the product. she has shared a number of techniques with perfect pearls that have inspired me to break them out of the drawer once in a while.
the LIQUID PEARLS were very popular when they were introduced a few years ago. you could get them in a variety of colours with the pearl finish....writing with them. making small (or big) pearls. spreading them over the paper or flowers with your finger.
POWDERS. these are loose mica powders that look a lot like make-up! they have a built in resin making them quite simple to use. you can buy them separately, or in sets of 4. when you use them in this form you need to have a Perfect Medium ink pad...it is like a VersaMark ink pad....just more sticky. however, VersaMark also works fine if that is what you have on hand. you need 2 brushes: one fluffy and one that will give you good detail for painting. if you aren't into stamping, you can use the powders for painting. use them like paint. combine them with water and then paint like you would with watercolour paint. if you want colour, you can add colour with your ink pad. the sets of 4 are a great bargain because they include both brushes and the ink pad.
here is one of my favourite videos from 2Peas in a Bucket:
a great video.
you can make your own mist with water and perfect pearl powders. you will get a shimmer...but not a background colour. you could combine powders to get a unique pearl. if you want background colour, you can add some re-inker to the mist. now, there is another option on the market. PERFECT PEARL MIST. these don't have colour, just the pearl finish. if you love to ink with Distress Inks you will know that they are water based and will react when you add water. the bonus to the pre-mixed version is that they have something in the mist that will not react with the distress inks. which is great if you want a shimmer but don't want to get the water effect you would with the homemade mist. (so far, i have not had any issues with this product clogging.
last week i hosted a make and take tag at Urban Scrapbook where we looked at 5 techniques at using Perfect Pearls. i had a simple tag version, and a more detailed version. i also typed up the techniques so that our customers could also add that to the back of the tag. this way it was a quick reference that reviewed what techniques they learned.
here are the tags:
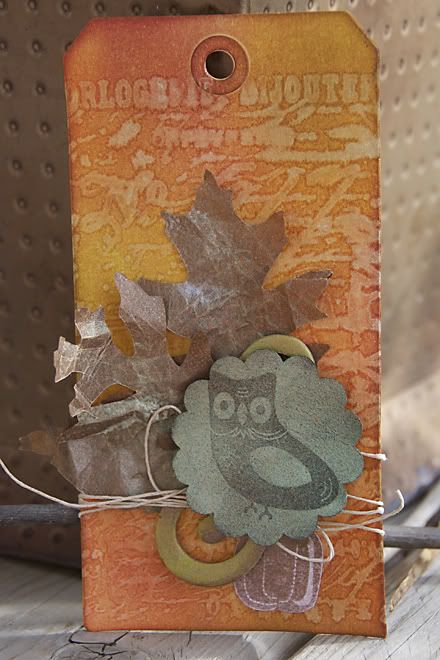
tough to photograph the shimmer!
the scalloped circle was punched out of a dark brown cardstock. we inked the entire die cut into versa mark ink. then we used a fluffy brush to BRUSH the loose powders onto it. next we inked an owl stamp with the same ink and stamped onto the pearls. when we lifted up the stamp, it removed the pearl powder with it!
the pumpkins and pointy leaves were done in a similar way. we stamped the images onto plain cardstock using the same ink. then we brushed the loose pearl powders over it. the powders only stuck to the inked portion.
in both instances, we misted the papers with plain tap water to bind the pearls to the paper.
we also did some painting with the pearls and inks. rub an ink pad over your non-stick mat then spritz with water. sprinkle some perfect pearl powder and mix with your paintbrush.
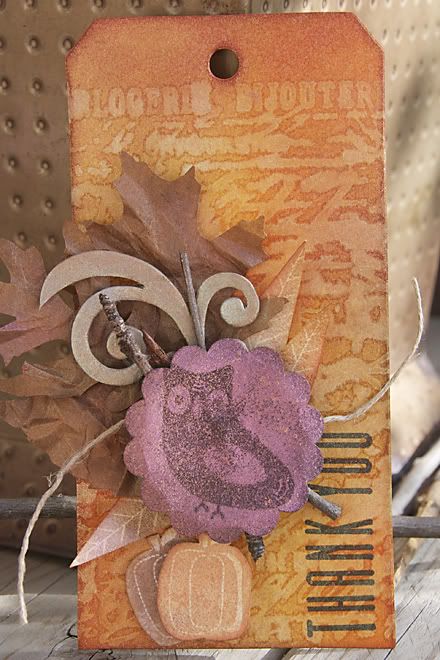
the background was inked with distress inks and a blender tool with foam. also rubbing an ink pad over the non-stick mat, adding water and perfect pearls. take a background stamp and ink it up in the mixture, then stamp over the tag. the water will react with the ink background and kind of remove some colour. the pearls will rise to the top and kind of create an embossed look. this technique is very impressive in real life...but the photograph does not do it justice!
you could do something similar with cardstock, but the new Kraft Glassine Papers make this next technique amazing! crumple the glassine in your hands. brush dry perfect pearl powders over top. to finish it, heat with your heat tool for a few seconds. the waxy coating will warm and the powders will "sink" to the paper and become embedded within the wax.
not that it needed more shimmer...but i also spritzed it with the Perfect Pearl Mist in Copper.
i stamped "Thank You" with my black archival ink pad. the cool part is that the background is not completely hidden behind it.
Aidan was feeling left out one day. Kiara got to do science experiments with her dad, and he needed to find something else to do. yes, we are doing our best to raise little nerds!!! they love to do "research" and "experiments" with Daddy. i had to refine the tag, so i asked Aidan if he wanted to join me and make one of his own. following my instructions on technique and using the supplies i had on my desk, this is what he came up with.....
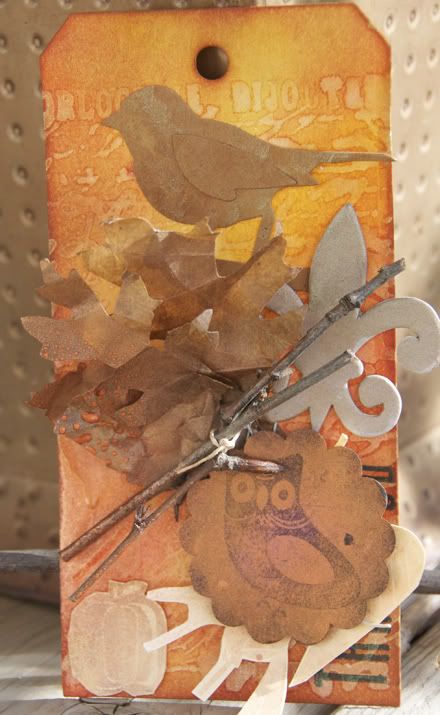
we had a lot of fun!
supplies like ink pads and unique embellishments - like perfect pearls - are pricier than paper. i used to avoid buying them. however i find i get more of an investment from these items. they work with many different brands and types of paper. i wish i could buy ALL the colours. however, slow is good too. ha!
a good start is some basic colours....any red, yellow, blue...start with those and you can create almost any colour! i was so surprised to get my supply list for a watercolour class i took many years ago. she asked for 2 of each primary colour....one warm and one cool. i think a white and black was also added. it really is amazing the variety of colours you can create with just a few as a base. and if you discover you use them a lot and want some specific colours....well, then you can budget for the ones you want. i think it is important to buy tools and supplies that we will actually use and use frequently! the only supply that makes me groan when i run out of it is adhesive!! the good thing about inks and pearls....a little goes a long way. it will be years before you will have to replace any of them. if you are using them in normal use, for yourself.
OK!! You got my attention about the pearls!! Great techniques!!
ReplyDelete