
as promised here are another set of cards.
the first few are more examples of the stamping with Distress Stains and Distress Markers.
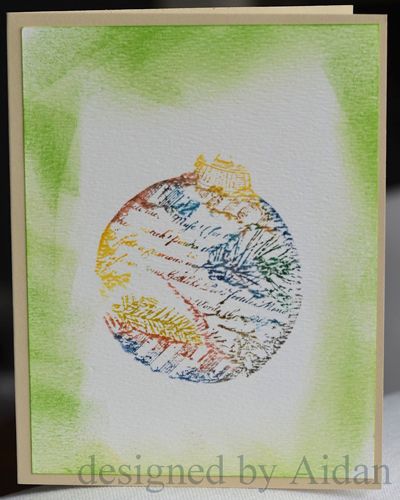
Aidan painted on the stamp with the markers. you can get a lot of detail this way. then he spritzed it with water. he wanted more colour, so he used a blending tool to add the green on the edges.
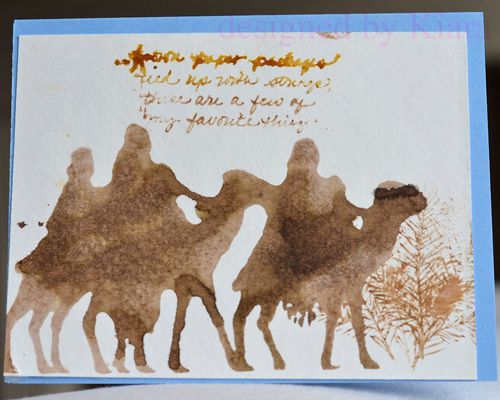
this card was created with 3 different stamps and the Distress Stains. the camels were spritzed with water. it looks like she either got extra ink or extra water on the top portion of the writing stamp. i love the end result. it's hard to say what exactly happened with the pine branch on the right corner. it was definitely stamped several times....perhaps spritzed for the first stamping and then she cleaned the ink off onto the paper itself. a nice effect however she managed to create it!
if you have not tried the metallic stains yet....oh, wait until you see the next set!
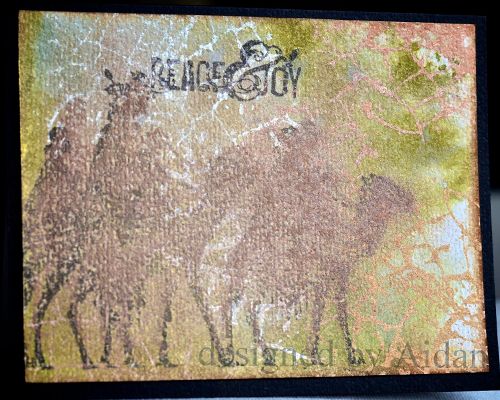
Kiara had gone to bed and Aidan wanted to try more techniques. this is several layers of techniques!
to start, he inked up an acrylic block with Distress Stains, then spritzed with water and perfect pearls and laid the paper directly on it. then he dried it with the heat tool.
for the second layer, he inked a background stamp with the metallic distress stains. he used all of the colours! then it had to be dried.
the third layer was the camel stamp inked with black archival ink. it really didn't pop like we expected. we cleaned off the stamp and then he added clear embossing ink and stamped carefully over the first image. then he brushed on some perfect pearls in cappuccino. he was happy with how it looked and decided to finish off the card with the title and a final spritz of Gold Perfect Pearls. it is definitely festive!
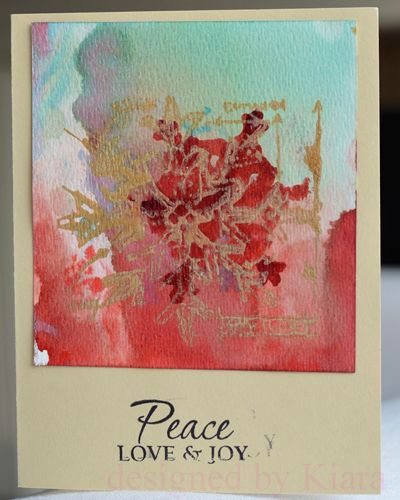
the next day we showed Kiara how to create the cool backgrounds. this is the result.
she chose to do a Distress Stain/water spritz on a snowflake stamp. it was difficult to see, so i suggested she stamp another image in gold metallic stain. this is the stamp she chose. it is definitely a unique design. she was in awe over how different the backgrounds looked, even using the same colours of ink.
you will see this same technique on other cards i will be sharing this week. definitely a favourite for them.
this next set is using a new concept. Hero Arts is one of the companies that is known for their high quality stamps and inks. they have started designing background stamps and matching embossing folders. the kids loved this one. you ink the stamp first. then line up the snowflake images with the ones on the embossing folder and then emboss it.
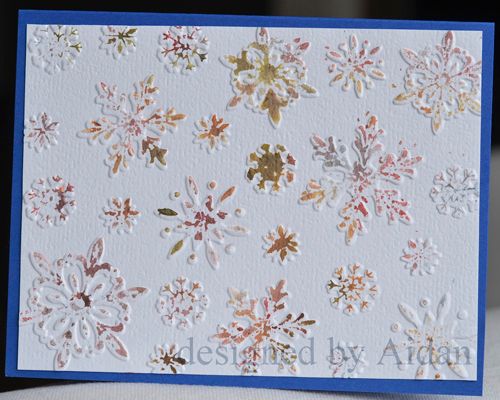
this was one of the first Aidan created using this technique. you can get a good idea of how well the stamps and embossed images work together. i like the imperfect flake images he got on this one.
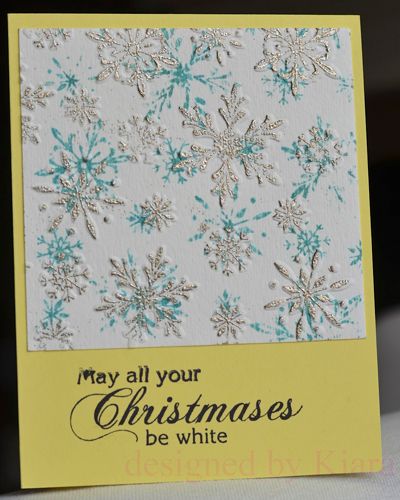
Kiara took a twist on this technique, creating two layers. the first layer was just using the stamp, blue Distress Stain and water. then she used clear embossing powder, silver embossing powder and created a second layer with heat embossing. we matched up the silver embossed images with the folder and ran it through the Vagabond.
one thing i love about the kids' designs is that they get over imperfections so quickly. if things don't work they don't even analyze why they didn't. it is debatable over who had more fun.....them or me!
No comments:
Post a Comment
Thank you for taking the time to comment!