
and my first video.
don't be too harsh with me and my video taping skills. movie producer or actress i am not!
i did find making a video easier than taking photos, editing them, and writing up the techniques.
my most recent year in review class had a few of my very regular students missing. for a variety of reasons. because the ladies missing were those who rarely miss my classes, i had been thinking about what i could do to help them out. i thought it might be helpful to go over a few of the more difficult or tricky techniques. i've left the layout at Urban if you need to see some of the details in person. i will also bring a few of the supplies to our next year in review class. this way you can use the stamp or the edge punches if you need them! just bring your paper and pearls from your kit.
i'll spread the videos out over a few posts.
today are the videos about Perfect Pearls.
the first one is to review that pink strip of paper with the lovely doily lace edge die. it is blue in the video, but in your kit it is pink! i demonstrate how to trim it as well as what i did to add the perfect pearls.
i did not demonstrate the perfect pearl technique on the little kraft envelope....but you will do it using the exact same method. in preparing the kits, i did not edge punch the top edge of the envelope. i used a doily lace edge punch from Martha Stewart for my border.
the stamps used were from Stampers Anonymous created by Tim Holtz --- Book Covers CMS103. however, any background stamp will work perfectly well. there are some lovely background stamps that would do the trick. another option, if you have a stamp collection, is to use a variety of stamps to create a collage.

here you can see the close up of the envelope.
most of the envelope is visible. i would recommend you start the pearls with the pink borders strip. a good portion of the pink paper is not visible behind the photos and envelope.
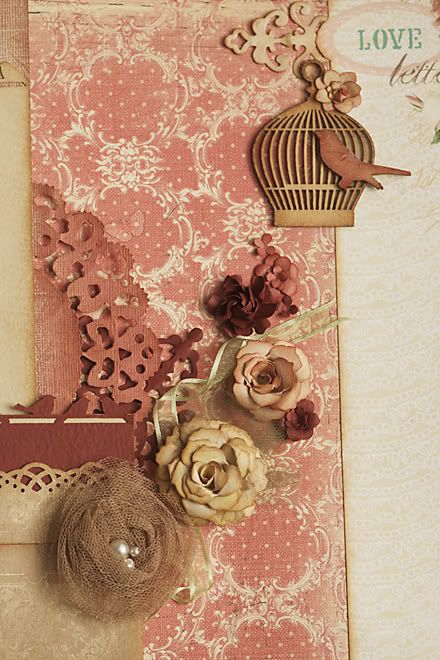
the next video is demonstrating the use of the inks and perfect pearls on the Kaisercraft wood birdcage and bird.
in my layout, the birdcage was done just with my brown inks. i used my ink blender tool to colour the wood.
for the bird, i used a combination of the inks and perfect pearls with water to achieve the colours. it is much smaller than the heart i used in my video, but the technique is the same. the bird shape has 2 sides, you could always test the technique on the "wrong" side. if the whole thing just goes south and isn't working...spritz with water to "clean off" the ink, allow the wood to dry thoroughly and start again.
if you enjoyed working with Perfect Pearls, and would like to learn more...i would recommend you checking out the Thinking Inking videos posted at Two Peas in a Bucket. two of the videos address perfect pearls specifically. here are the links to Jennifer McGuire's first video, and her second video. both are using perfect pearls. she is a fabulous video tutorial maker!
You're a STAR, Roxanne.....the videos are AWESOME :)
ReplyDelete